Background

Showing posts with label Winter. Show all posts

Tuesday, November 13, 2012

Hooded Cowl

Hooded Cowl

Materials:
Lion Brand Wool-Ease Thick & Quick Yarn in Barley
N Hook

*Note on adjustments:  This pattern was created for my 3 year old daughter.  It is easily adaptable, though!  1) Simply begin with more chains to make larger (or less chains to make smaller), 2) when beginning the hood you'll need to figure out how big to make the opening for the size you're looking for (you'll begin in the same stitch, but will end in a different stitch than is written), and 3) add more (or less) rows to the hood.

Keep all stitches slightly loose to allow the hood to move easier while wearing.  Thick yarn like this can easily be pulled too tight and just be stiff.

Ch 35, loosely.  Join with sl st in first ch made.
R1-R5: Ch 2.  DC in each st around.  Join in top of first DC made.
R6: Ch 2.  DC in each of the next 25 st.
R7-R16: Ch 2, turn.  Skip first st.  DC in each st to end of last row, placing final DC in top of turning chain.
 At the end of R16, you have a couple of options.  You can tie off the ends here, then use a yarn needle and a long piece of yarn and sew along the top edge of R16 to create the hood.  OR, you can do what I did:  Ch 1, turn.  Put ends of top of hood together and either sl st or SC across the entire work.  Then, tie off you yarn.  Turn the entire project inside out to hide that seam and you're done.  :)

Friday, November 9, 2012

Big Bow Headband

Big Bow Headband

This is going to be a fun hair accessory for girls to wear to all of those holiday gatherings!

Materials:
Caron Simply Soft yarn in your choice of color (I used Autumn Red)
H Hook

*Note: This pattern was written to fit my petite 3 year old.  The pattern is adjustable, though!  To make larger or smaller, just begin the band with enough chains to fit your child's head snugly.  Once you start to stitch into the chains, they will stretch slightly-plus, as the headband is worn, it is likely that it will stretch out a bit and you want it to stay fairly snug on the child's head.  You can also consider purchasing some elastic (as in the elastic used for waistbands in sewing) and sew that inside the headband. 

Band:
Option 1:
Ch 68 (or to fit circumference of head).  Join with sl st in 1st ch made. Ch 2.  DC in each stitch around.  Join in top of 1st DC made.

Option 2-a little more snug:
Ch 68 (or to fit circumference of head).  DC in 3rd ch from hook, and each ch across.  Tie off yarn.  With this option, you should attach a button or some elastic to hold it in place on the head.

Bow:
Ch 30. Join with sl st in first ch made.  
R1-R4:  Ch 2.  DC in each st around.  Join with sl st in top of first st.
 At the end of R4, tie off yarn.

Center of Bow:
Ch 10.  DC in 2nd ch from hook and each st across.  

Putting it all together:
Lay "Bow" on top of band where you would like to attach it.  Take "Center" and wrap it around the bow and the band, then sew the ends together on the inside (where it will lay against the head).  I recommend using a few stitches to attach the bow directly to the band as well, otherwise the bow will slide freely along the band.

Friday, November 2, 2012

Autumn Scarf


Autumn Scarf

Materials:
H Hook
Vanna's Choice Yarn in Autumn Print

Ch a multiple of 4.

R1: [2 TC, ch2, 1 DC] in 6th ch from hook.  *Skip next 3 ch.  [2 TC, ch2, 1 DC] in next ch.*  Repeat to last 2 st.  Skip next ch.  1 TC in final ch.  Turn.

R2: Ch 3 (counts as first DC).  *[2 TC, ch2, 1 DC] in next ch 2 sp.*  Repeat across.  1 TC in top of turning chain.

Repeat R2 for pattern.

Consider adding a fringe or a fun border to this scarf!

Tuesday, October 23, 2012

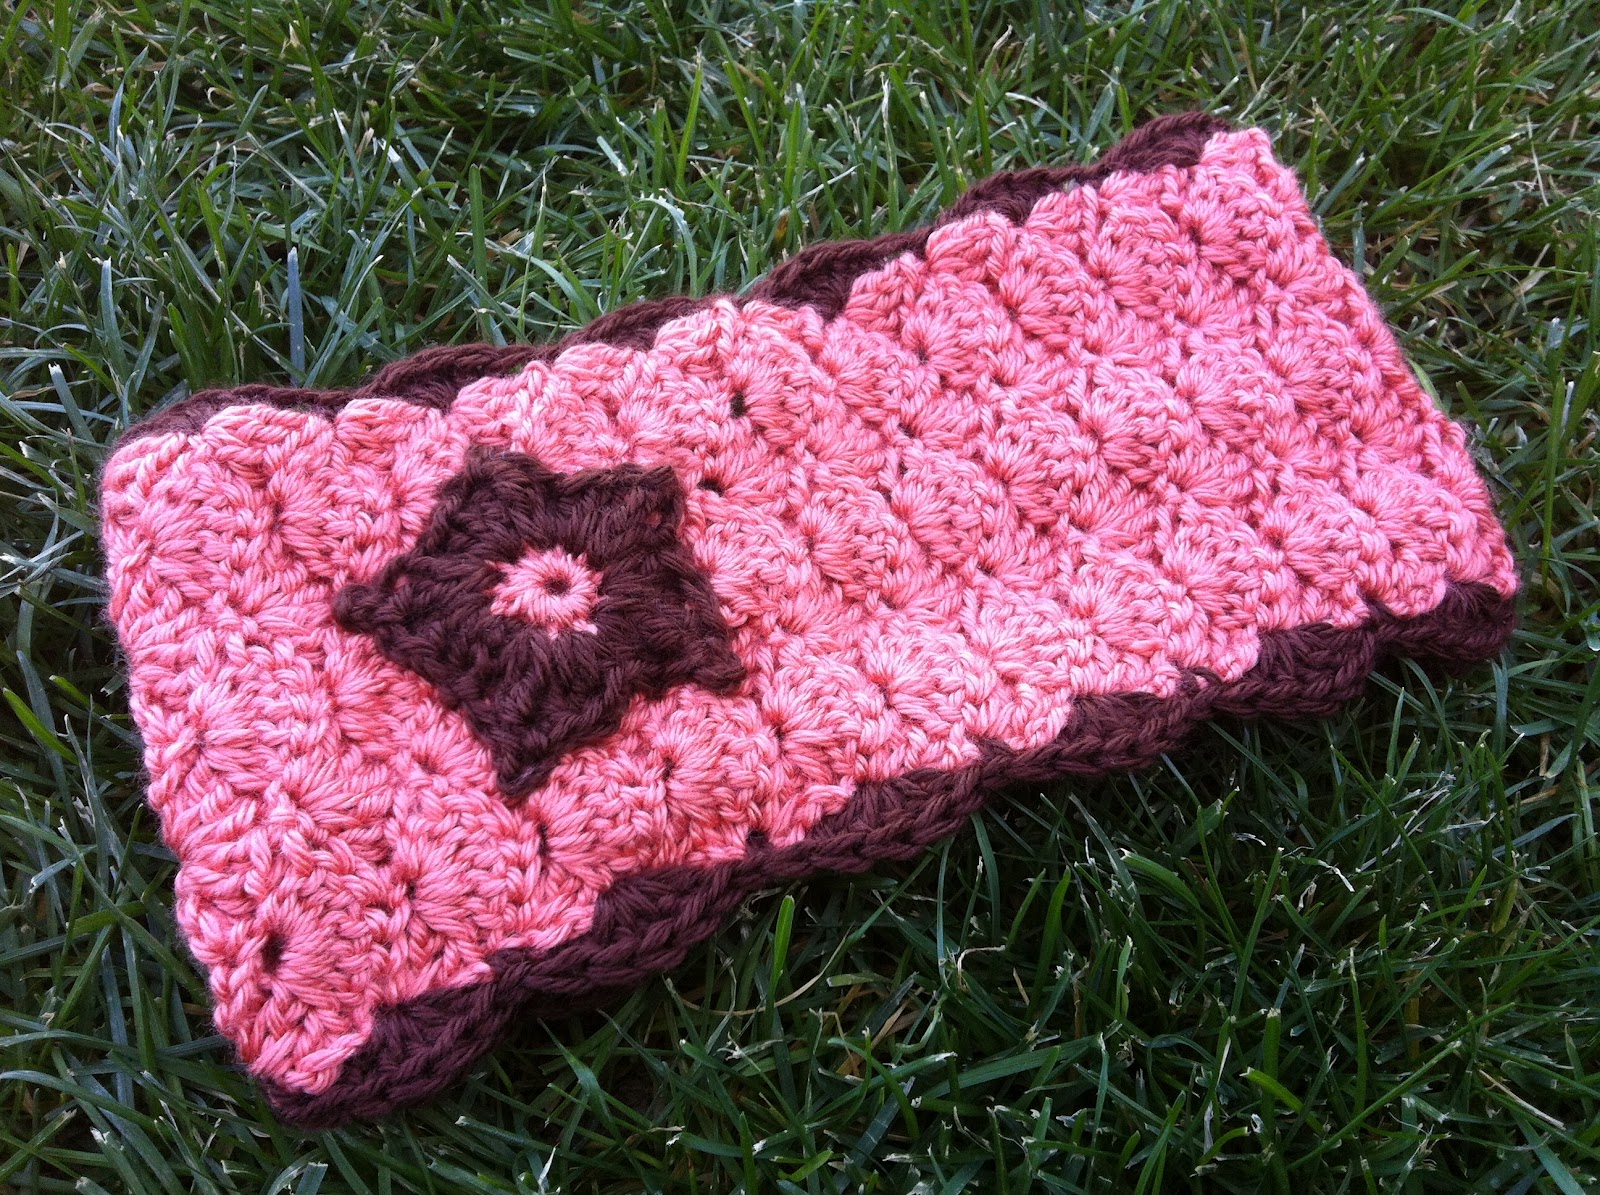
Shell Headband Earwarmer


The star applique will be in an upcoming post.  
 
Materials:
I Hook
Caron Simply Soft Yarn (I used Persimmon and Chocolate)
Button
Need & Thread (to attach button)

Ch 14.  
R1: SC in 2nd ch from hook.  Sk 2 st.  5 DC in next ch.  Sk 2 st.  1 SC.  Sk 2 st.  5 DC in next ch. Sk 2 st.  SC in final ch.  (2 shells created)
R2: Ch 2 (counts as SC).  4 DC in same st.  *Sk 2 st.  5 DC in next st.  Sk 2 st.  1 SC.* Repeat to end.  (3 shells)
R3: Ch 3 (counts as DC).  2 DC in same st (Half shell).  Sk 2 st.  1 SC.  Sk 2 st.  5 DC.  Sk 2 st.  1 SC.  Sk 2 st.  5 DC.  Sk 2 st.  1 SC.  Sk 2 st.  3 DC.  (Half shell).
R4-R38:  Repeat R2 and R3 for pattern.
R39: Ch 1.  SC3tog.  Sk 2 st.  5 DC.  Sk 2 st.  1 SC.  Sk 2 st.  5 DC.  Sk 2 st.  1 SC.  SC3tog in next 2 st and top of turning ch.  Ch 1 to secure.  

Border:
Join yarn in SC in the middle of final row, between shells.  Continue the fan pattern used in headband (using 5 DC's to create shell and using 1 SC between shells to anchor.)

When finished, sew a button at one end to secure it to the head.

Friday, October 12, 2012

Sweet Hat with Bow


New pattern for sale on Etsy & Craftsy!  This pattern is easy to follow and produces SUCH a cute result!  Check it out!

Friday, October 5, 2012

Easy Fingerless Gloves

 Easy Fingerless Gloves

Materials:
I Hook
Worsted Weight Yarn (I used Heather Grey)

Ch 32.
R1: DC in 3rd ch from hook and each st across. 
R2-R14: Ch 3, turn.  Skip 1st st.  DC in each st across and in top of turning ch.  Tie off at the end of the final row (R14).

To assemble:
Use a yarn needle and yarn.  Sew up the first 5 stitches.  Skip next 4-5 stitches (depending on how big you want your thumb hole to be), then continue to sew to end of glove.