Background

Showing posts with label Women's. Show all posts

Tuesday, October 23, 2012

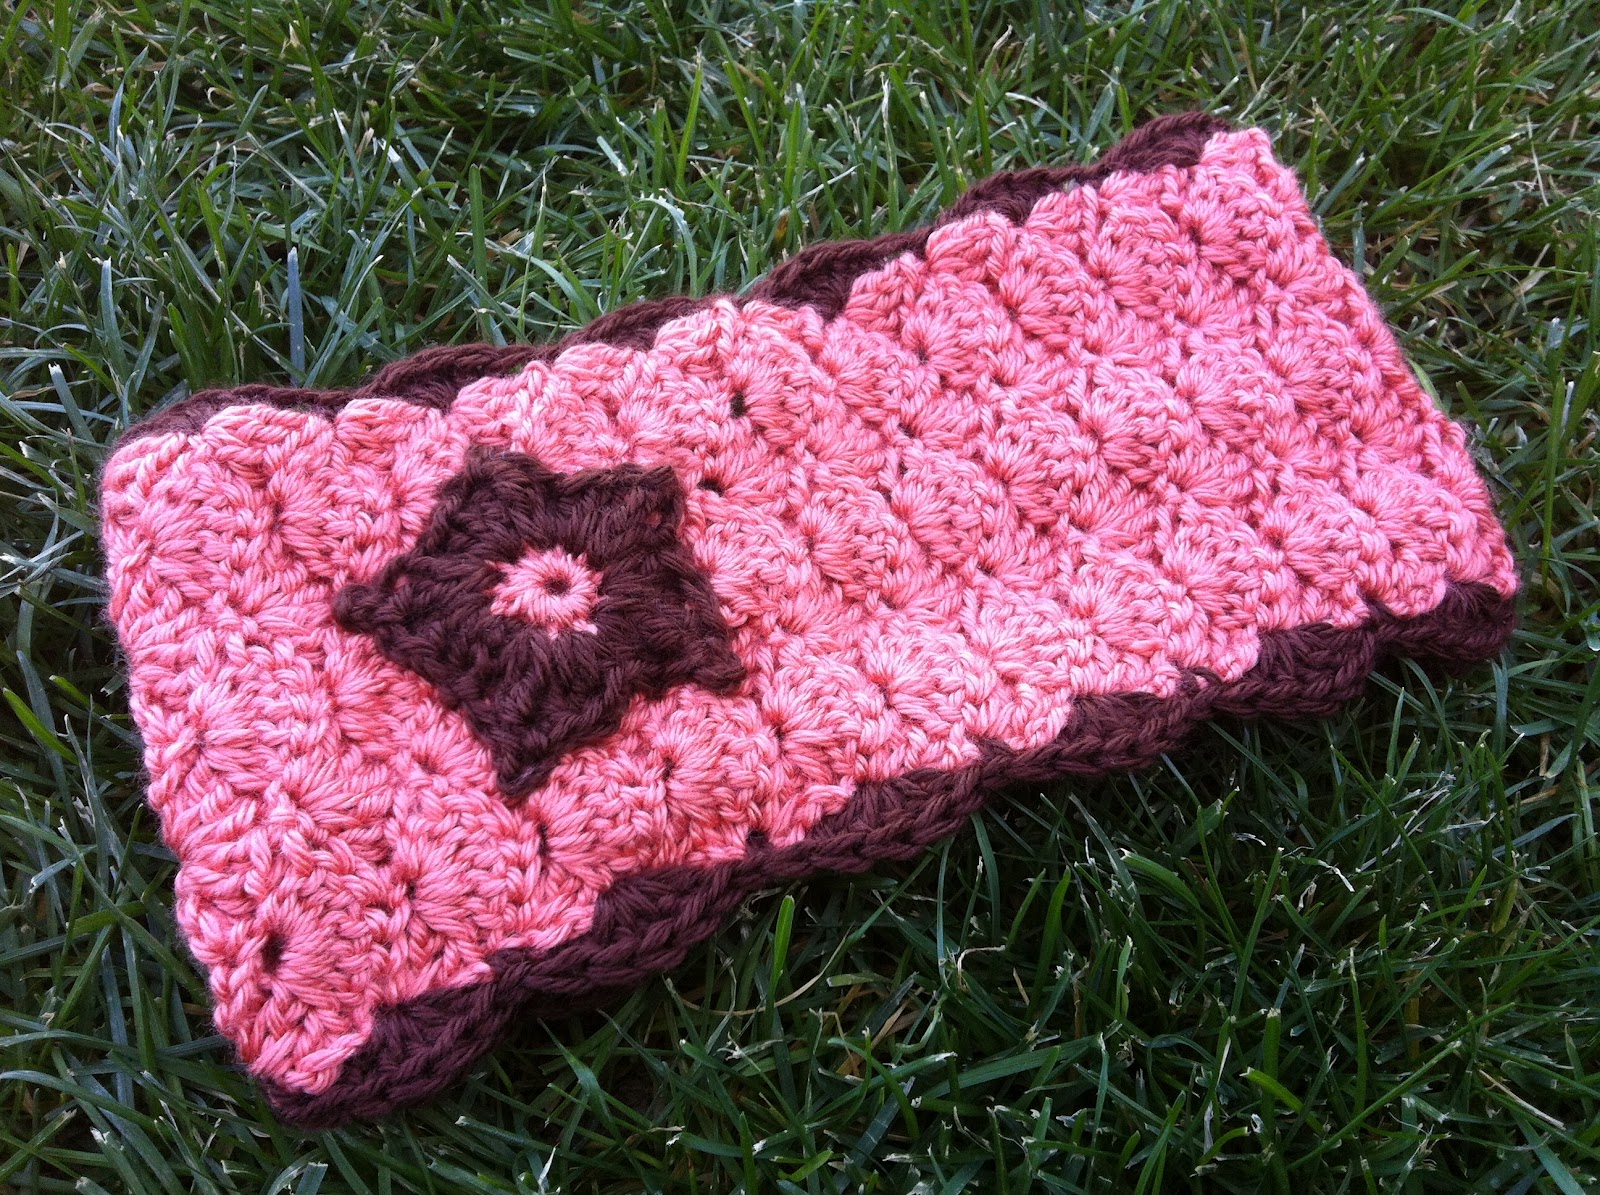
Shell Headband Earwarmer


The star applique will be in an upcoming post.  
 
Materials:
I Hook
Caron Simply Soft Yarn (I used Persimmon and Chocolate)
Button
Need & Thread (to attach button)

Ch 14.  
R1: SC in 2nd ch from hook.  Sk 2 st.  5 DC in next ch.  Sk 2 st.  1 SC.  Sk 2 st.  5 DC in next ch. Sk 2 st.  SC in final ch.  (2 shells created)
R2: Ch 2 (counts as SC).  4 DC in same st.  *Sk 2 st.  5 DC in next st.  Sk 2 st.  1 SC.* Repeat to end.  (3 shells)
R3: Ch 3 (counts as DC).  2 DC in same st (Half shell).  Sk 2 st.  1 SC.  Sk 2 st.  5 DC.  Sk 2 st.  1 SC.  Sk 2 st.  5 DC.  Sk 2 st.  1 SC.  Sk 2 st.  3 DC.  (Half shell).
R4-R38:  Repeat R2 and R3 for pattern.
R39: Ch 1.  SC3tog.  Sk 2 st.  5 DC.  Sk 2 st.  1 SC.  Sk 2 st.  5 DC.  Sk 2 st.  1 SC.  SC3tog in next 2 st and top of turning ch.  Ch 1 to secure.  

Border:
Join yarn in SC in the middle of final row, between shells.  Continue the fan pattern used in headband (using 5 DC's to create shell and using 1 SC between shells to anchor.)

When finished, sew a button at one end to secure it to the head.

Wednesday, February 29, 2012

Slouchy Legwarmers


Fun new pattern!  I've shown these legwarmers on my 2 year old daughter, but the pattern includes instructions for making these for anyone!  I'm going to be making a pair for myself soon!

Monday, October 31, 2011

V-Puff Hat with Easy Rolled Flower


Materials:
*Red Heart Yarn in Navy and Gold (This hat took about 1/2 skein of navy and just enough Gold to make the flower as big as you want it-I use Red Heart Yarn often for hats and blankets because it's pretty much the only yarn available in my small town.  One thing I don't really like about this yarn is that while working with it, it's really stiff!  However, once you wash it, it becomes soft.    This hat came out just a little big on me, but after a wash, it was fine and became really soft.)
*H Hook
*Yarn Needle

Special Stitches Used:
PS=Puff Stitch (Insert hook, YO and pull up yarn to the same height as a DC or a ch 2.  YO, insert hook again, YO, pull up length of yarn.  YO, insert hook a third time, YO, pull up length of yarn.  YO and pull through all loops on the hook.  Chain 1 to secure.)

Vpuff=PS, ch1, PS

Magic Circle
R1:  *PS, ch 1* Repeat 7 times around.  Attach to the top of first PS with sl st.
R2:  Sl st in next 2 stitches, taking you to the chain 1 space.  Sl st in chain sp.  Vpuff in each ch sp around.  Attach to the top of first PS with sl st.
R3:  Sl st in next 2 stitches, taking you to the chain 1 space.  Sl st in chain sp.  *Vpuff, PS.* Repeat *-* to end of round.  Attach to the top of first PS with sl st.
R4:  Sl st in next 2 stitches, taking you to the chain 1 space.  Sl st in chain sp.  *PS, PS, Vpuff.*  Repeat *-* to end of round.  Attach to the top of first PS with sl st.
R5:  Sl st in next 2 stitches, taking you to the chain 1 space.  Sl st in chain sp.  *Skip ch sp, Vpuff*  Repeat to end of round.  Attach to the top of first PS with sl st.
R6-R11:  Sl st in chain sp.  Vpuff, *Skip ch sp, Vpuff* Repeat to end of round.  Attach to the top of first PS with sl st.
R12:  Ch 2.  DC in each st around.  Join with sl st in top of first stitch.
R13-14:  Sl st around next DC of previous row.  Ch 3.  FPTC around to end of row.  Join with sl st in top of first stitch.

Easy Rolled Flower
Using Gold Yarn

Chain 60
In every other stitch: SC, DC, TC, DC, SC.
Continue to end of chains.  Sl st in last stitch to finish and then leave a long tail to sew up the flower.  
Roll up the petals, using yarn needle and tail to sew up the flower as you roll up.  If you leave a long enough tail, you can also use that yarn to attach flower to hat.

Thursday, October 27, 2011

Mustard Colored Ruffled Scarf


Ruffled Scarf
*The pattern instructions are for a toddler scarf, but this could easily be converted to a woman's scarf-which I plan to do shortly!

Materials Needed:
*H Hook
*Red Heart Yarn in Gold

Ch 12
R1: DC in 3rd chain from the hook, and in each chain across.  Ch 3, turn.
R2-R60: DC in front loop only of each stitch across.  Ch 3, turn. 

Crocheting only in the front loops creates "Free Loops" in which you will create ruffles later on.
 R61: 3DC in each stitch across (under both loops).  This is the first row of ruffled.  Now, we begin to work back over the scarf, adding the ruffles. 

3 DC around the last DC of previous row, as shown in picture. 
3 DC on the edge of the scarf, crocheted over the last DC of that row

Now you will begin to work in the free loops (abbreviated FL for the remainder of pattern).  3 DC in each FL across.  3 DC around last DC to move on to next row.  This requires turning the work, as the next row of FL is on the opposite side.  Continue spiraling around the scarf to in like manner to it's end. 


Happy Crocheting!